30th June 2013 – 3.31 pm
Scanning in EVE Online: Odyssey is easy. There's no need for a guide. Launch probes, point them at a signature already shown to you by the discovery scanner, and press a button. But in case you need more detail, I'll take you through the steps.
This is not a definitive guide to scanning, and certainly does not help with hunting pilots sitting safely in sites. There will be no video tutorial because I don't have the software available to do that, although I am trusting the steps will be descriptive enough to preclude needing video. I simply aim to show the basics of how I scan a system, with the reasons why. Before I start, there are terms that ought to be introduced and basic methods to be explained, so that the pictures will make sense.
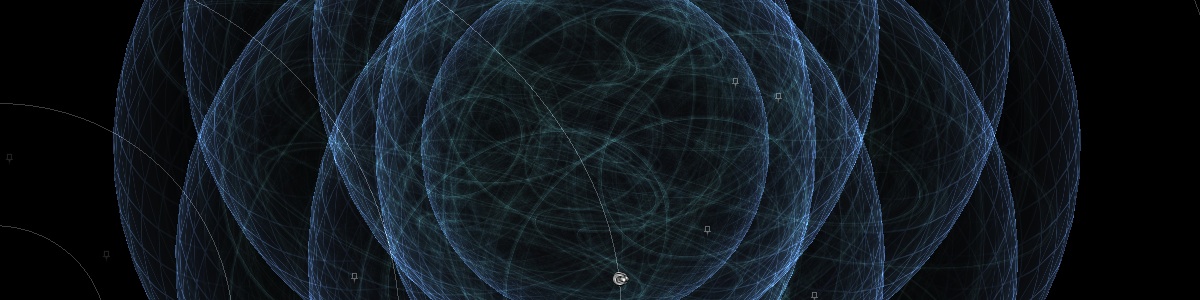
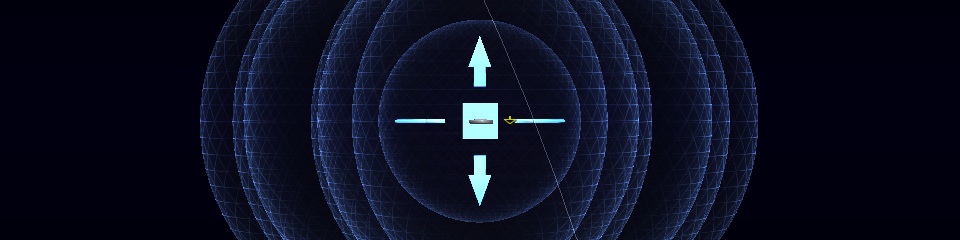
When launched, a scanning probe can be said to be represented by a sphere and a box. The sphere of the probe is its range, represented by a distance in AU that is the radius of the sphere. The box sits at the centre of the sphere and allows the probe to be moved in space.
Adjusting the range of probes can be achieved either by dragging the sphere of a probe inwards or outwards, or highlighting the probe in the scanning interface and using the context menu to adjust the range. Dragging the sphere will be more convenient, as doing so for one probe automatically and simultaneously adjusts the range of all probes.
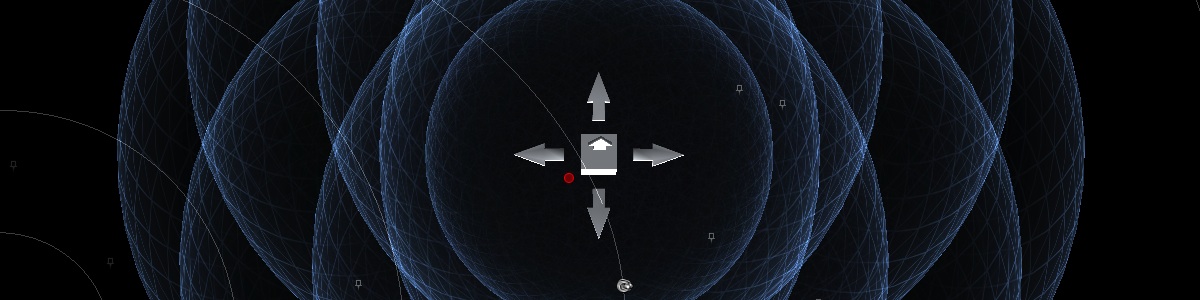
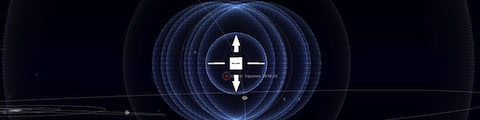
There are arrows pointing outwards from the box in both directions along each of the three axes. Dragging the probe by an arrow allows free movement of the probe in space only along that axis of movement. The probe's box has six planes. Dragging the probe by a plane allows free movement of the probe along that plane in space.
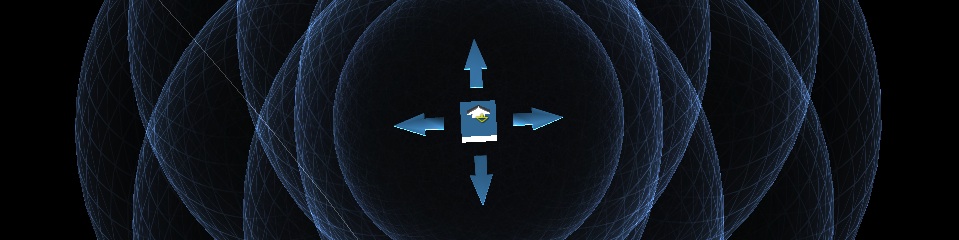
Only one box is shown normally. This is the box of a virtual probe sitting in the centre of all the probes currently launched. The virtual probe is used to manipulate what I will call the probe cluster. Moving the virtual probe moves the cluster as one, simply by grabbing the virtual probe and moving it as if it were a single probe.
Individual probe boxes can be revealed by use of the shift or alt keys, which are then used to manipulate single probes instead of the cluster. Shift-dragging a probe will move that individual probe without moving the others. Shift-dragging also works to adjust the range of an individual probe by dragging that probe by its sphere.
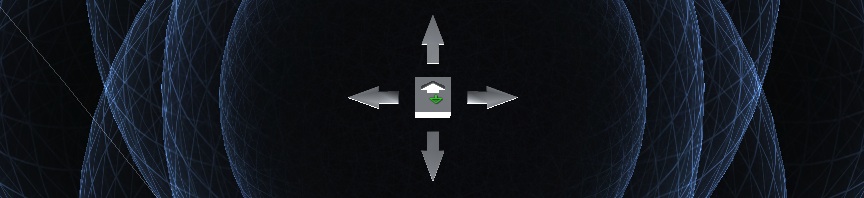
Alt-dragging a probe will adjust the separation of all the probes in the cluster in relation to the virtual centre of the cluster, so that if the probe you are dragging is moved towards/from this virtual centre then all the other probes will be moved towards/from the centre by a relative amount. Note that adjusting a probe's range now automatically maintains the separation of the probe cluster without requiring a modifier key to be depressed.
The other movement to be concerned with is zooming in and out of the system map. I use the mouse-wheel for convenience. Zooming in lets you align probes around signatures more accurately, as well as alter the ranges and separation of probes with greater precision.
Note that the view in the system map starts around your ship and any rotation of the display will have its vertex around that point in space. The vertex can, thankfully, be changed by selecting another object on the map, whether it be a planet, bookmark, probe, or even a signature. Select a probe by double-clicking on its box in the system map or identifier in the scanning interface, a planet or bookmark by double-clicking on its icon in the system map, and a signature by double-clicking on its dot in the system map or identifier in the scanning interface. Any of these actions will centre the display on that object in space, in all three axes.
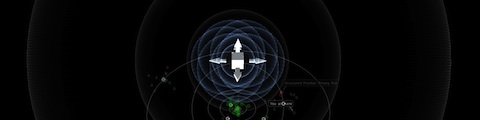
To start scanning, first we need to launch probes. The launch and arrangement of probes will be as per my Odyssey edition guide to performing a blanket scan of a w-space system, because that's how I like them.
A larger version of each image is linked behind the standard images in this post.
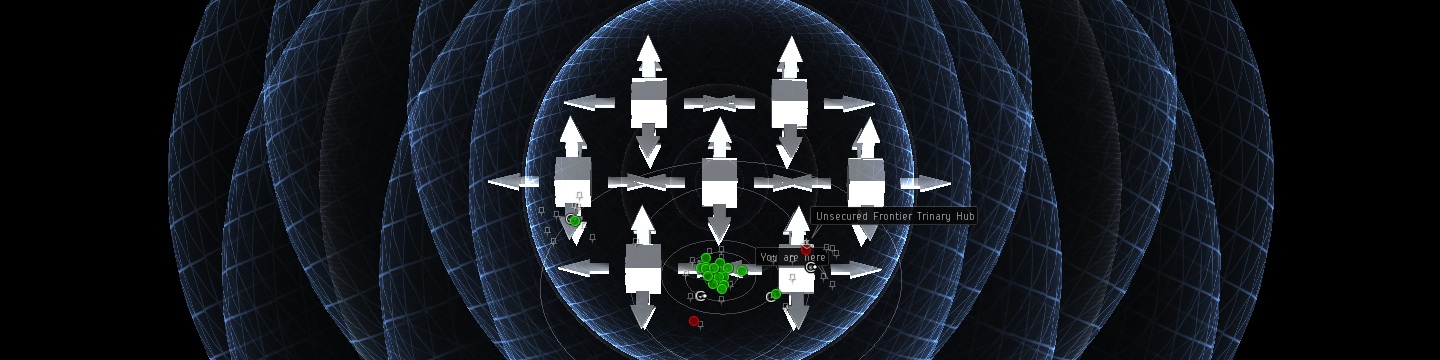
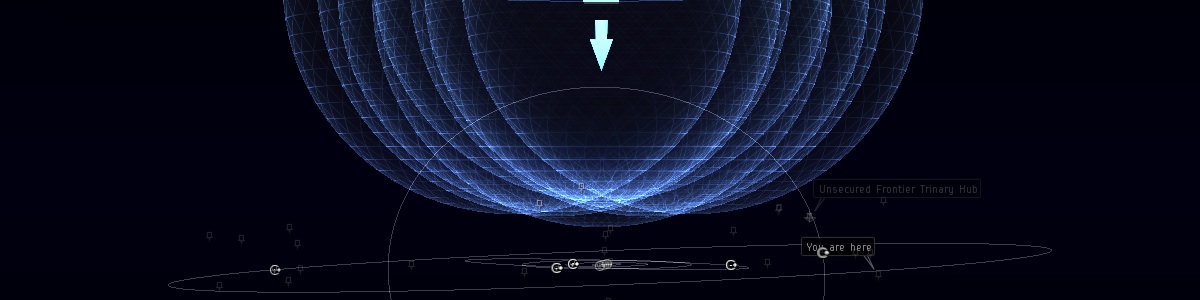
- Launch probes.

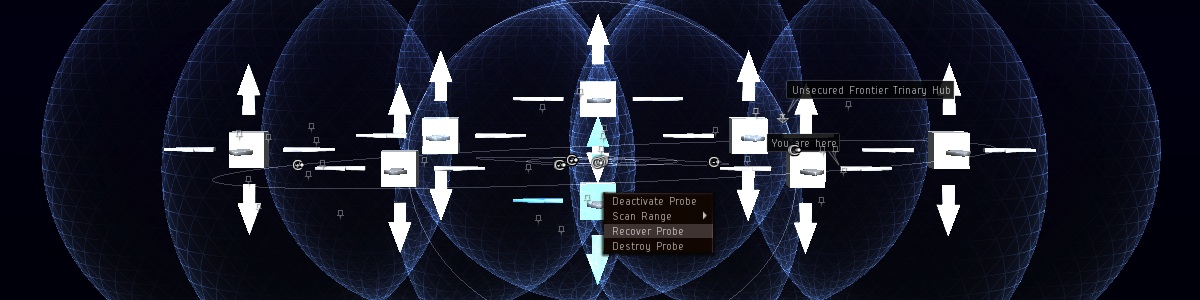
- Recall the lower of the two central probes.
Because it's out of position.
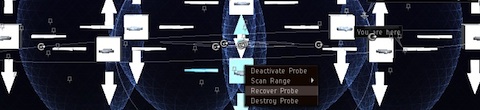
Hold shift to reveal the positions of the individual probes, and right-click on the box of the probe to be recalled. Select the 'recover probe' option to remove it from the cluster and return the probe to your ship's cargo.
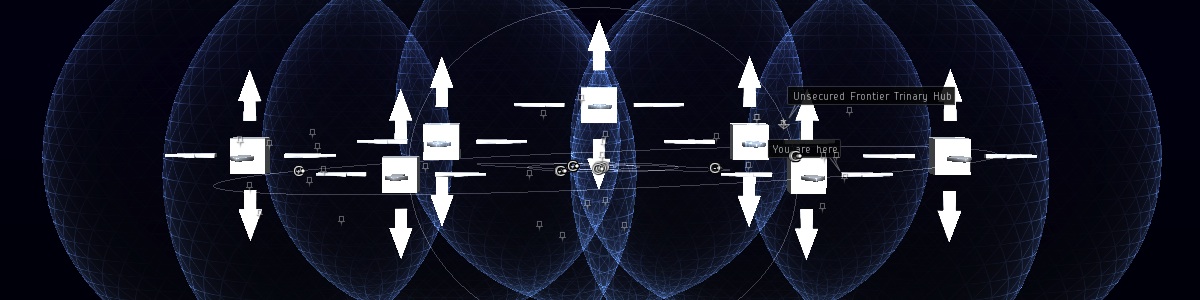
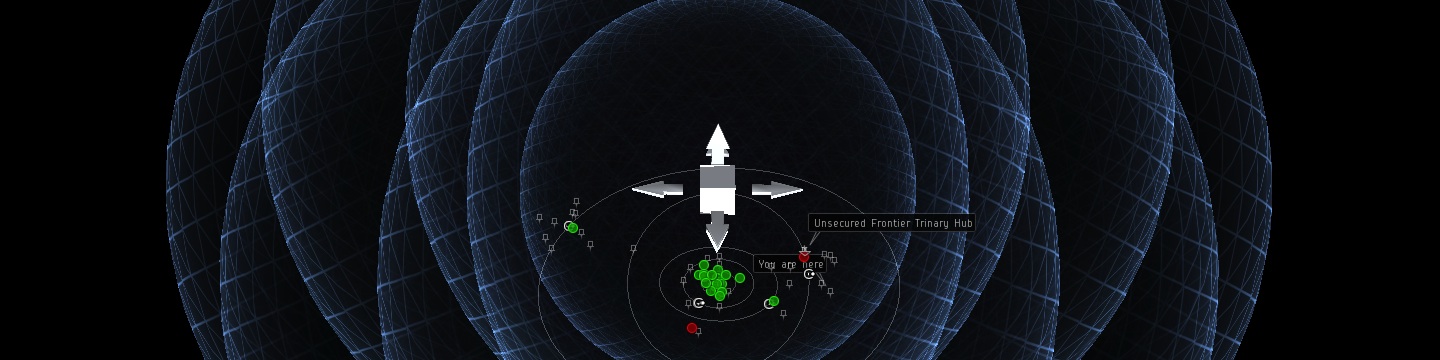
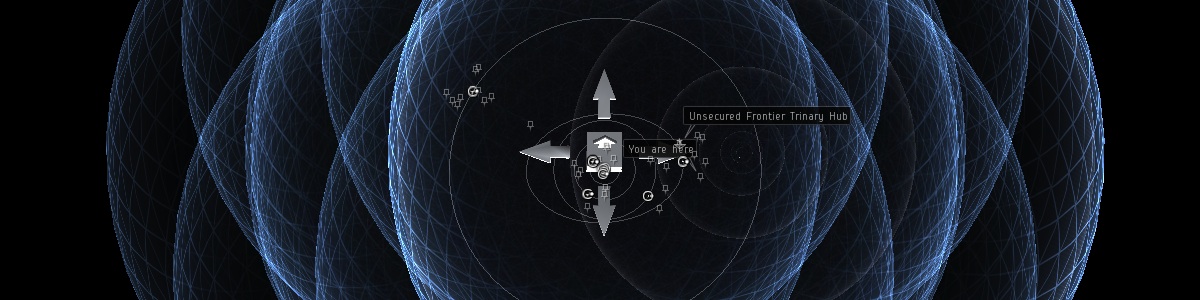
- Align the remaining central probe to be on the same horizontal plane as the satellite probes.
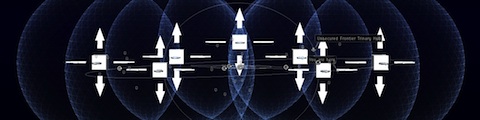
Because it's out of position.
Hold shift to reveal the positions of the individual probes, and use shift-drag to move the central probe downwards to flatten the formation. It's best to shift-drag the probe by the arrow, so that the probe can only be moved in the vertical axis.
If you don't care about having a flat probe pattern, feel free to skip the previous two steps.
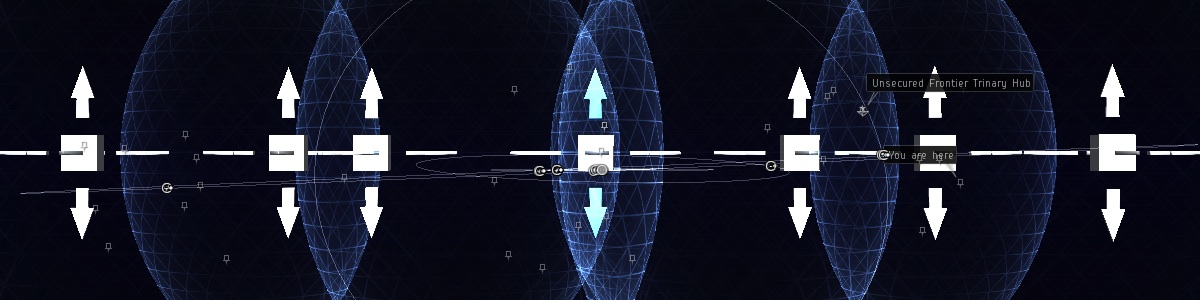
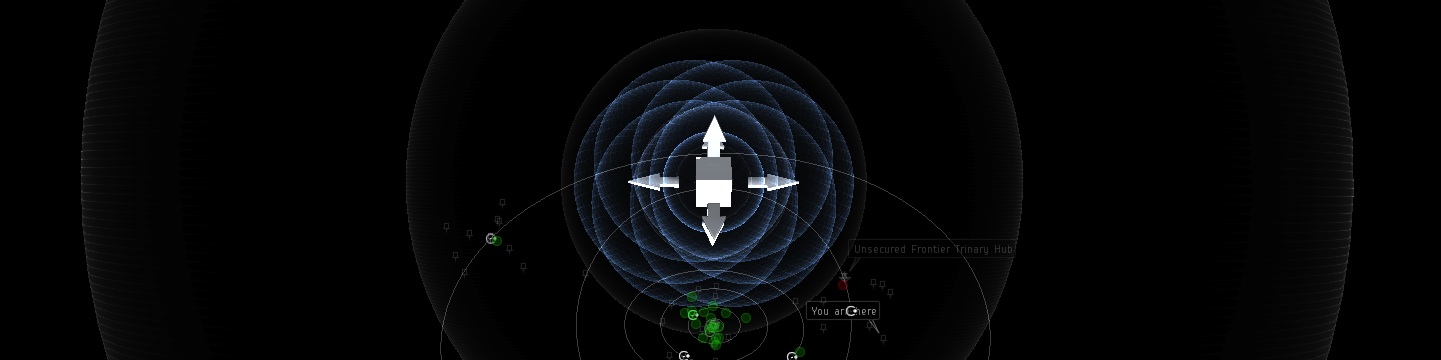
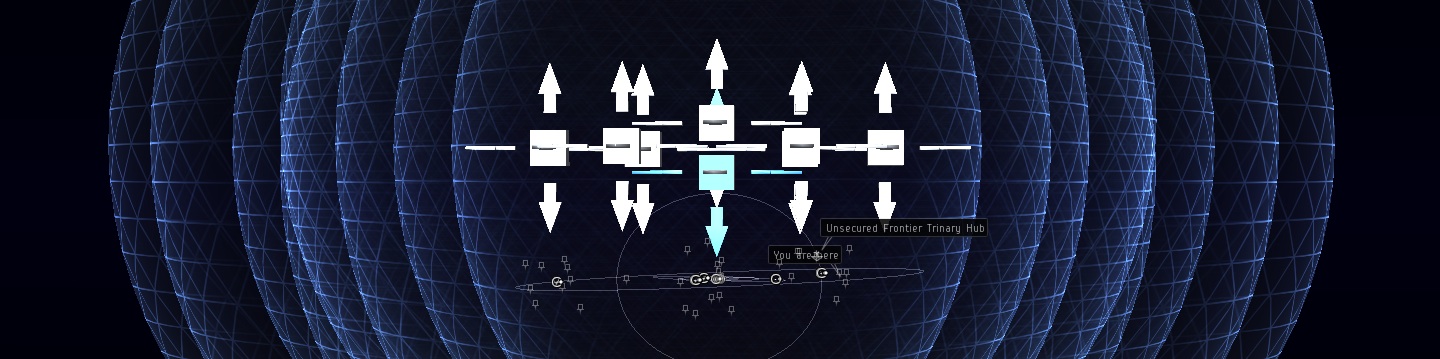
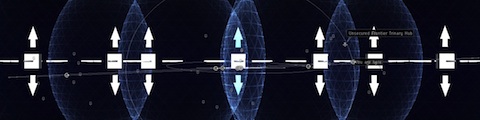
- Adjust the separation of the probe cluster.

Because they're out of position.
With the spread formation now looking like an actual spread formation, the separation of the probes can be adjusted properly. I find I get best results with the satellite probe boxes brought to be a little within the half-range line of the central probe.
Press alt to highlight the satellite probe boxes, and alt-drag one of them towards the centre of the probe cluster to get the required probe separation.
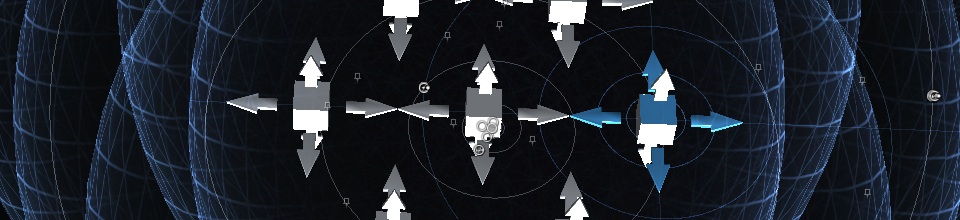
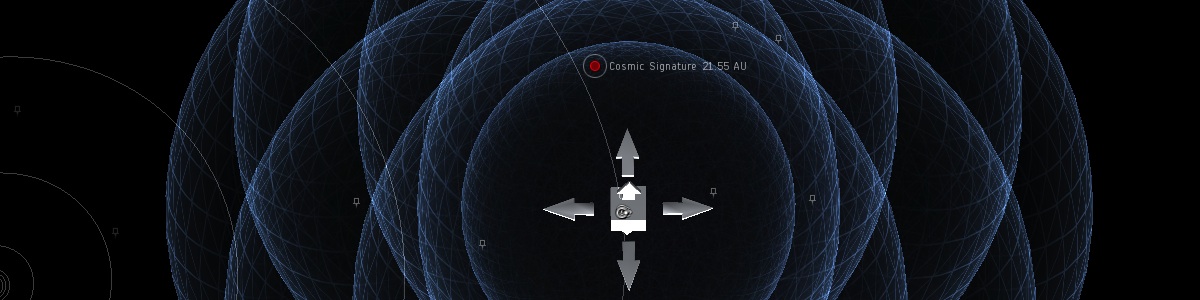
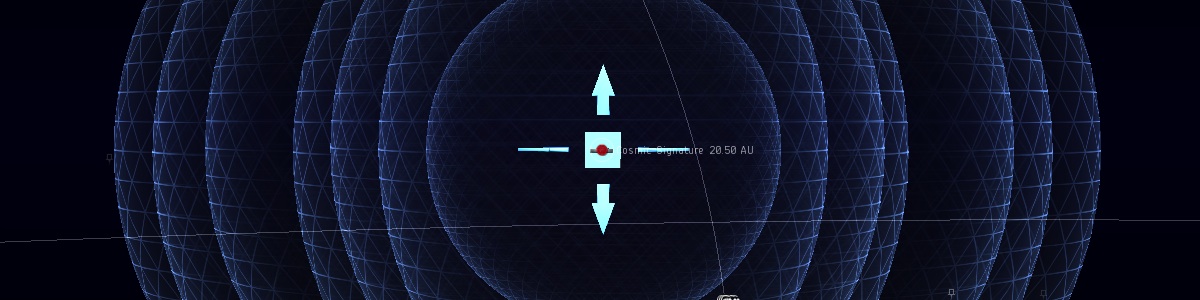
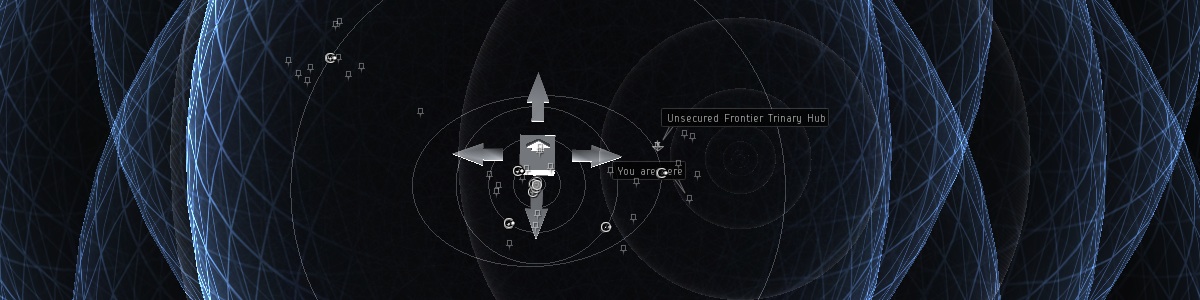
- Reduce the range of only the central probe by one step.

Grab the central probe's sphere, and shift-drag it down one step in range.


This step isn't strictly required for getting good scanning results, but it really helps the scanning process.
Grabbing a probe's sphere and adjusting its range adjusts the range of all probes, and adjusting the range of probes also changes the actual separation of the probe cluster to maintain its relative separation. Because of this, depending on which probe sphere you grab, and in which direction you drag it, there can be a positive or negative feedback effect.
You can drag a sphere so that your movement coincides with the automatic separation adjustment, such that both movements accelerate the overall adjustment in a positive feedback effect. This can cause you to overshoot your desired change in range.
You can drag a sphere so that your movement is opposite to the automatic separation adjustment, in a negative feedback effect, such that it takes around twice as much movement to change the probe range by the desired amount.
Needless to say, if you are expecting the positive effect and get the negative, or vice versa, then your smooth range change transition becomes a slow and frustrating effort or rapid shrinking to nothingness. The lack of visual feedback of the range value on the probes themselves does not help.
However, because the central probe is at the centre of the cluster, its separation relative to the movement of the other probes remains neutral. Thus if you adjust the range of the central probe you get neither a positive nor negative feedback effect, and can be guaranteed a reliable movement-to-range adjustment process each time.
The only problem with attempting to adjust the central probe's range is in grabbing the right sphere amongst the mess of the satellite probe spheres all overlapping each other. But by reducing the range of only the central probe by one step, the central probe's sphere becomes much more obvious, and range adjustments can be made with confidence and fluidity.
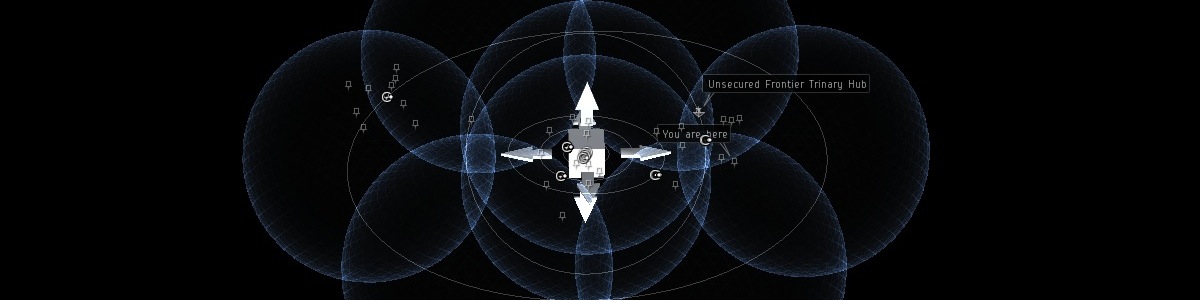
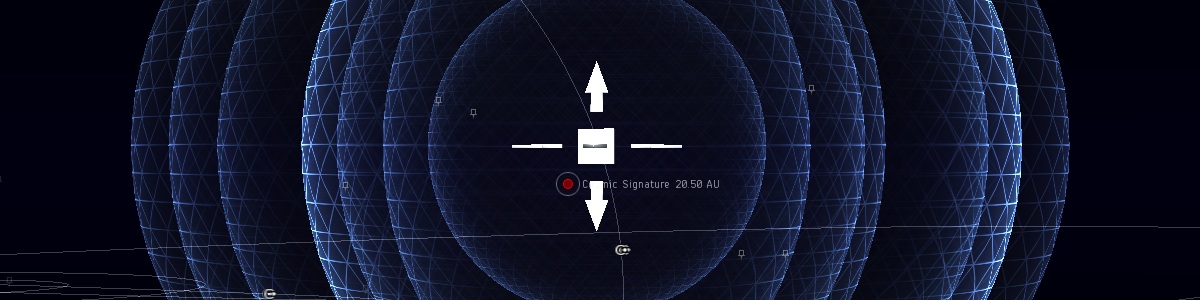
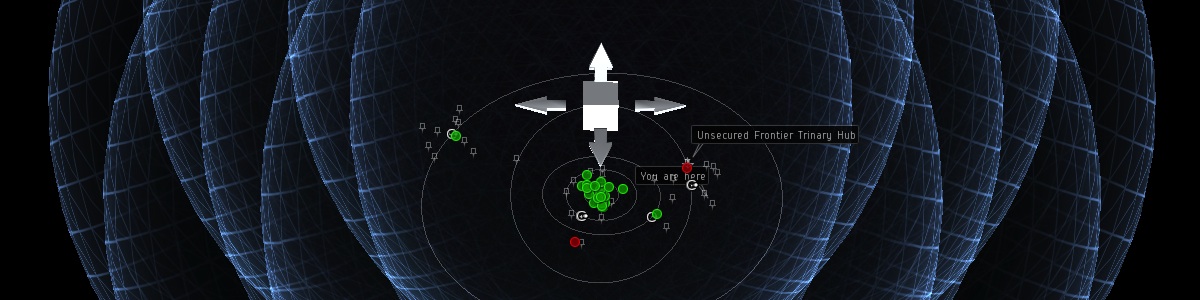
- Adjust the range of the probes for the initial scan.
As signatures appear within 4 AU of celestial objects, and to have some overlap of multiple probes on each signature, the quickest scanning method is to have the initial probe range set to 8 AU on the satellite probes. This gives a central probe range of 4 AU.
Note how even dropping down from the 32 AU/64 AU range of the blanket scanning arrangement to the 4 AU/8 AU range of the focussed scanning arrangement is straightforward when adjusting the range of the central probe, and how easy it is to discern the central probe's sphere when it is reduced a step from the satellite probes.
My thanks go to my colleague Kename Fin for this tip.
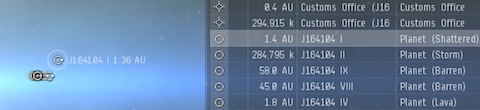
- Pick a signature of interest.

Any signature, it probably doesn't matter.
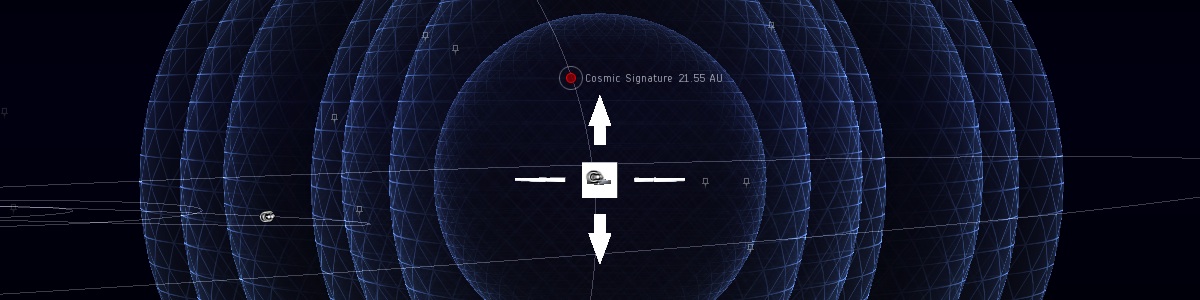
- Rotate the view to the horizontal.

From here we can adjust the position of the probes so that they are on the same vertical plane as the signature. It is important to do this probe movement first, as in CCP's wisdom your view cannot be rotated fully to ninety degrees so that you are looking directly down and instead are restricted to a slightly oblique point-of-view. As such, adjusting the horizontal probe position before the vertical can then introduce a new horizontal error because you are not looking directly down the vertical axis of the probes.
Note that the view rotates around your last selected position, which is your ship's position on the system map by default. Try scanning and rotating the view without selecting a probe or signature at some point to learn a lesson in frustration. Otherwise, remember to re-centre your view by double-clicking on the signature, either in the system map or scanning interface. Alternatively, double-clicking on the probe box will centre the view there.
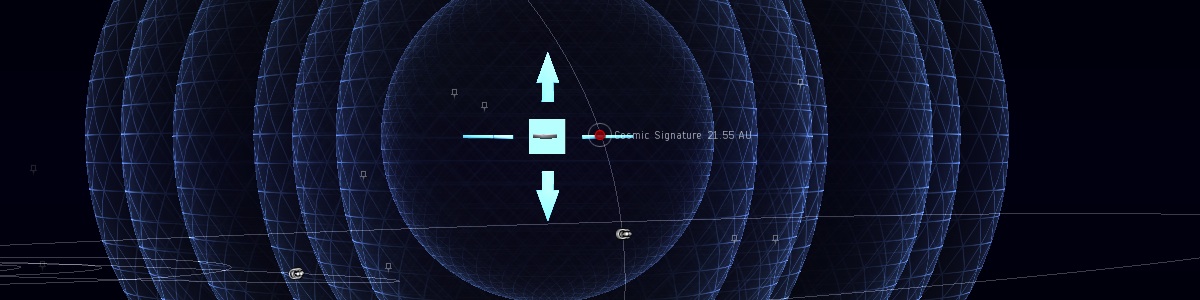
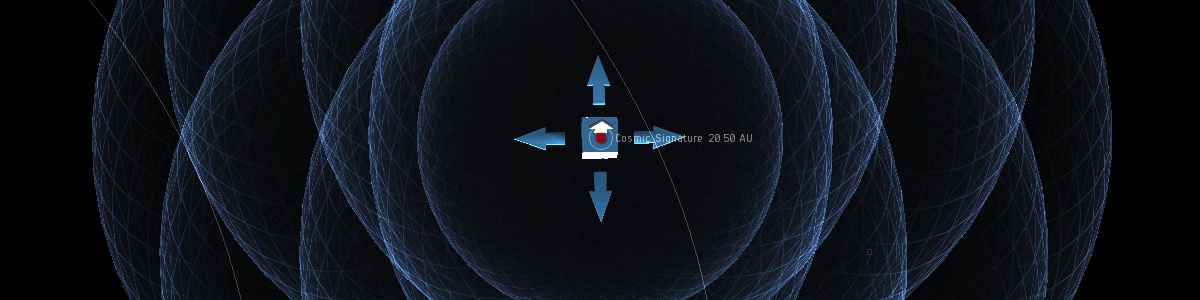
- Move the probe cluster to be vertically aligned with the signature.

Grab the virtual probe box and drag the cluster up or down.
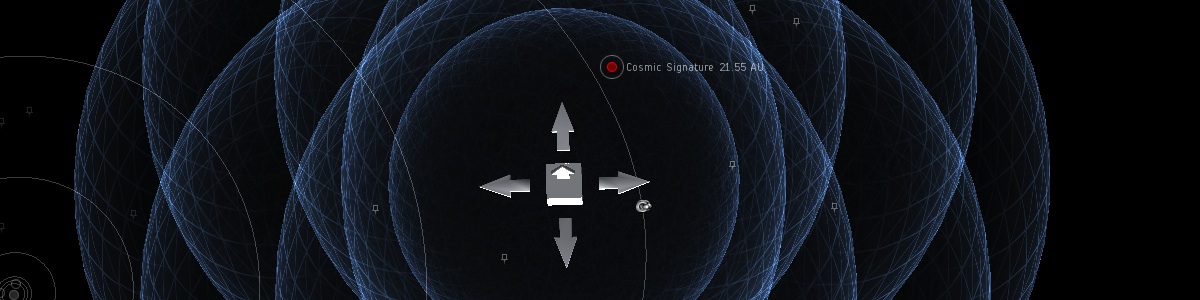
- Rotate the view to the vertical.

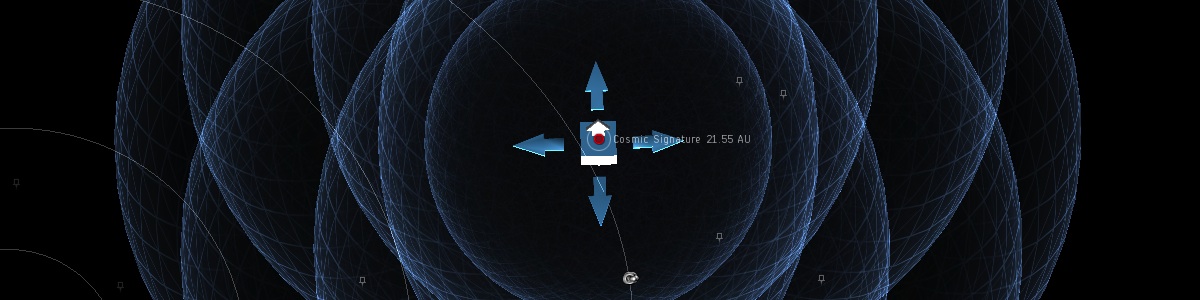
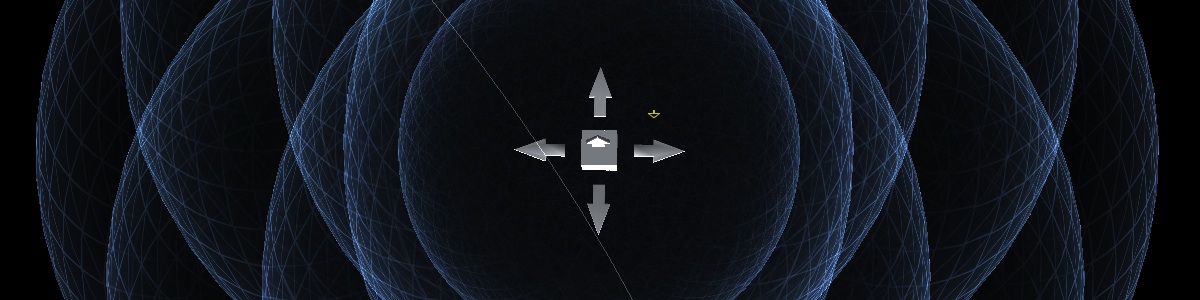
- Move the probe cluster to be horizontally aligned with the signature.

Grab the virtual probe box and drag the cluster until the centre of the box sits on top of the signature.
- Scan.

You can use this time to bookmark resolved signatures, double-click on probes or signatures to reset your view, or update d-scan to see who else is in the system with you.
- Get the refined signature position.

The second scan will give a better result than the first, although it may not seem like it if you are scanning a particularly weak signature like a data or relic site.
Once you have resolved the signature enough to see the site type it can either be safely ignored if you are not interested in that type or fully resolved if you are. Let's assume that we are interested in resolving the site.
Now we repeat the procedure, to refine the result further.
- Rotate the view to the horizontal.

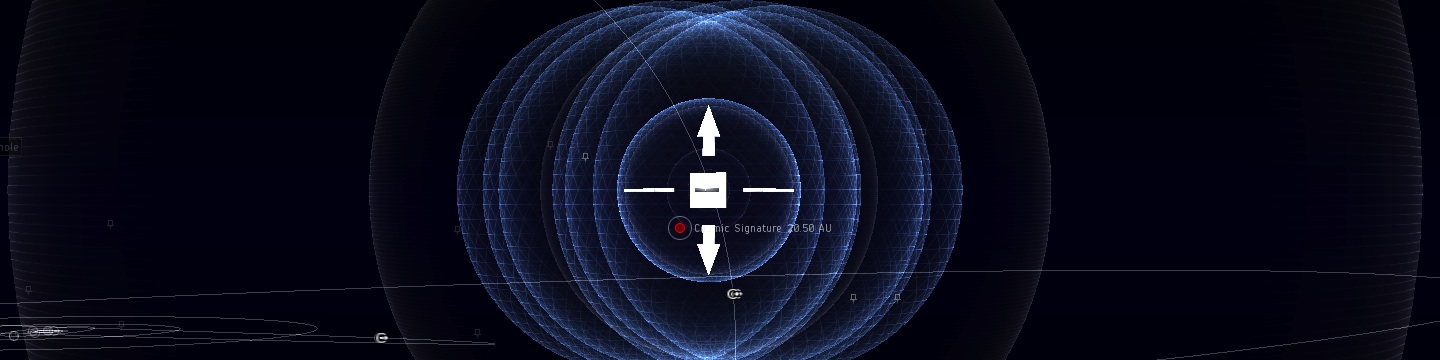
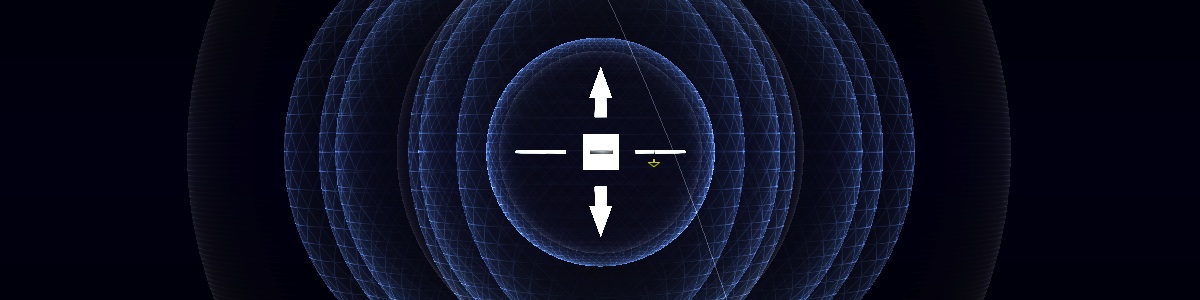
- Reduce the range of the probe cluster by one step.
Grab the central probe sphere and smoothly drag it inwards by one step.
To get a better scan result on the signature we need to increase the strength of the probes, which means reducing their range. Always reduce the range of the probes one step at a time. Any greater reduction is a tempting way to save time but could result in not quite covering the signature's actual position with the probes and it being fuzzier than before, taking an unnecessary extra stage to correct for the supposed time-saving step. It will probably help to zoom the view in a little at this point.
- Move the probe cluster to be vertically aligned with the signature.

- Rotate the view to the vertical.
- Move the probe cluster to be horizontally aligned with the signature.

- Scan.

- Repeat the process until the signature becomes a solid green result.


If you can't get a 100% result with the probe cluster at 0·5 AU/1 AU range, and you need to drop all probes to the 0·5 AU range, you will need to grab a satellite probe's sphere to accomplish this. No problem. Do that, scan, and when increasing the probe cluster's range to the reset position simply drop the central probe's range by one step once more before continuing.
Now bookmark, warp to, or ignore the resolved signature, whatever you like.
It would be silly to resolve a site to 100% and not bother or forget to bookmark it. I indicate the type of site by a leading initial, followed by the three letters that form the first part of the signature identifier, followed by the complete name of the site that is given automatically. Other naming conventions work just as well.
Note that bookmarking a site bookmarks its cosmic signature, whose placement will differ based on the type and variation of site. Never bookmark a wormhole solely from the scanning interface as the cosmic signature can be several kilometres from the wormhole itself. Use the scanning interface result only as a rough guide for wormholes, and always visit the wormhole to get a precise location to bookmark.
If you forget to bookmark the signature, don't worry. Sites and wormholes remain resolved to 100% until a session change occurs, so subsequent scans in a different volume of space don't negate the result. However, be aware that ships and drones are not similarly saved results and need to be bookmarked before any subsequent scan.
That's one signature resolved. Now we start again. Reset the central probe to have a 4 AU range, giving the satellite probes an 8 AU range, move the cluster over the same celestial object if there are more signatures to resolve around it, or another celestial object otherwise, and repeat until there are no more signatures to resolve.
It's possible to short-cut scanning a little, mostly when multiple signatures are close together. If you are only looking for wormholes you can cluster your probes around several close signatures and hope to get a 25% or better result so that more than one site can be ignored at once. Or you can note the approximate position of nearby signatures when scanning at 4 AU or even 2 AU, so that when you resolve the current signature you can move the probes to that remembered position and continue scanning without having to revert right back to an 8 AU range.
The above steps may seem like a lot of effort, but that's because of the explanation included with each step. Once what is trying to be achieved is understood scanning can be performed fluidly and quickly. With only a little practice, more time will be spent waiting for scan results than adjusting and moving probes. Using less detail, and with the initial launch and adjustment steps removed, the process can be seen to flow better.
- Centre view on signature.
- Reduce probe range.
- Mouse-wheel zoom in.
- Move probes vertically.
- Move probes horizontally.
- Scan.
Lather, rinse, repeat. Gas sites are ignored and wormholes found in no time.
One last note: when you have finished scanning, it's worth taking a moment to reset your probes to your favoured launch formation before recalling them. For me, that's the blanket scanning formation of an 8 AU range central probe, 16 AU range satellite probes, sitting about 18 AU above the ecliptic plane. This is because your probes are next launched in the pattern and position in which they were last recalled, and it's normally more convenient to spend a few seconds cleaning up at the end of scanning than fiddling with them in a newly entered system.

That's how I scan.
Posted in Gaming | 5 Comments »
Tags: eve online, mmorpg, scanning